High Top Mountain Quilt
I’m woefully behind on sharing some quilt finishes in this space, so today I’m checking one of my favorites off the list. Last year, my brother asked if I’d make a quilt for my (then unborn) nephew based on the cover art of a favorite Sturgill Simpson album of his and his wife. You know I love a challenge, so I was all in, and that precious baby is now the owner of the quilt I probably spent the most hours on of anything I’ve ever made. But, of course, it wasn’t as simple as that…

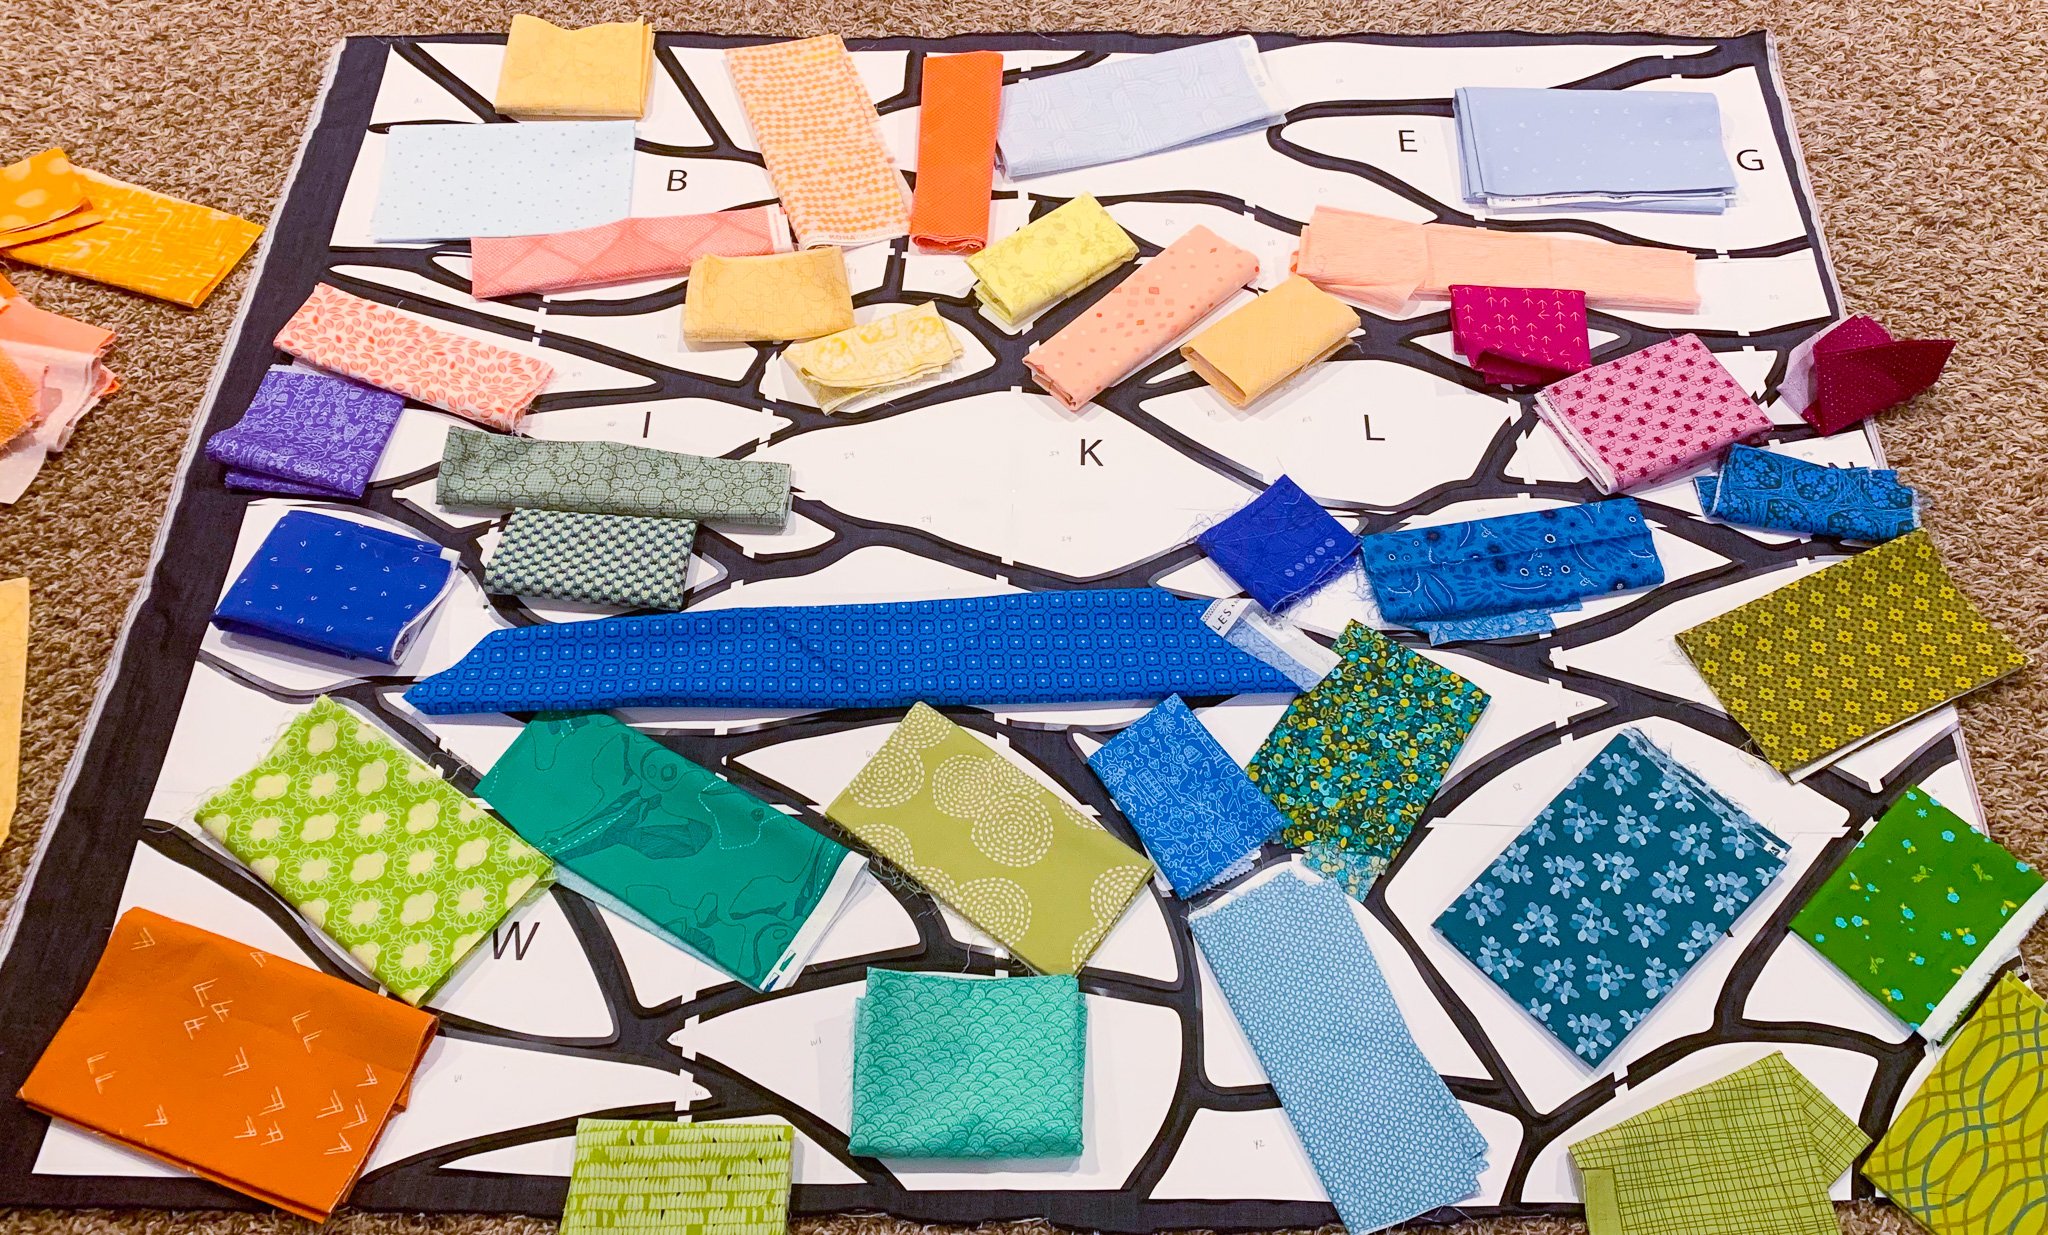
The beautiful artwork on the album cover is by artist Jim Harris, so the first step in the journey was getting his permission to use it. I reached out to him, and he replied with the kindest email saying he’d love for me to use it and was excited to see the results. So, off I went! I began by importing the art into Adobe Illustrator and making a line drawing of the artwork. I then re-sized the image to a comfortable crib size — I wanted to be sure my nephew would get to use it for some time but that it was also a size they could use as a wall hanging if desired — and printed out the image to turn into templates…so many templates.

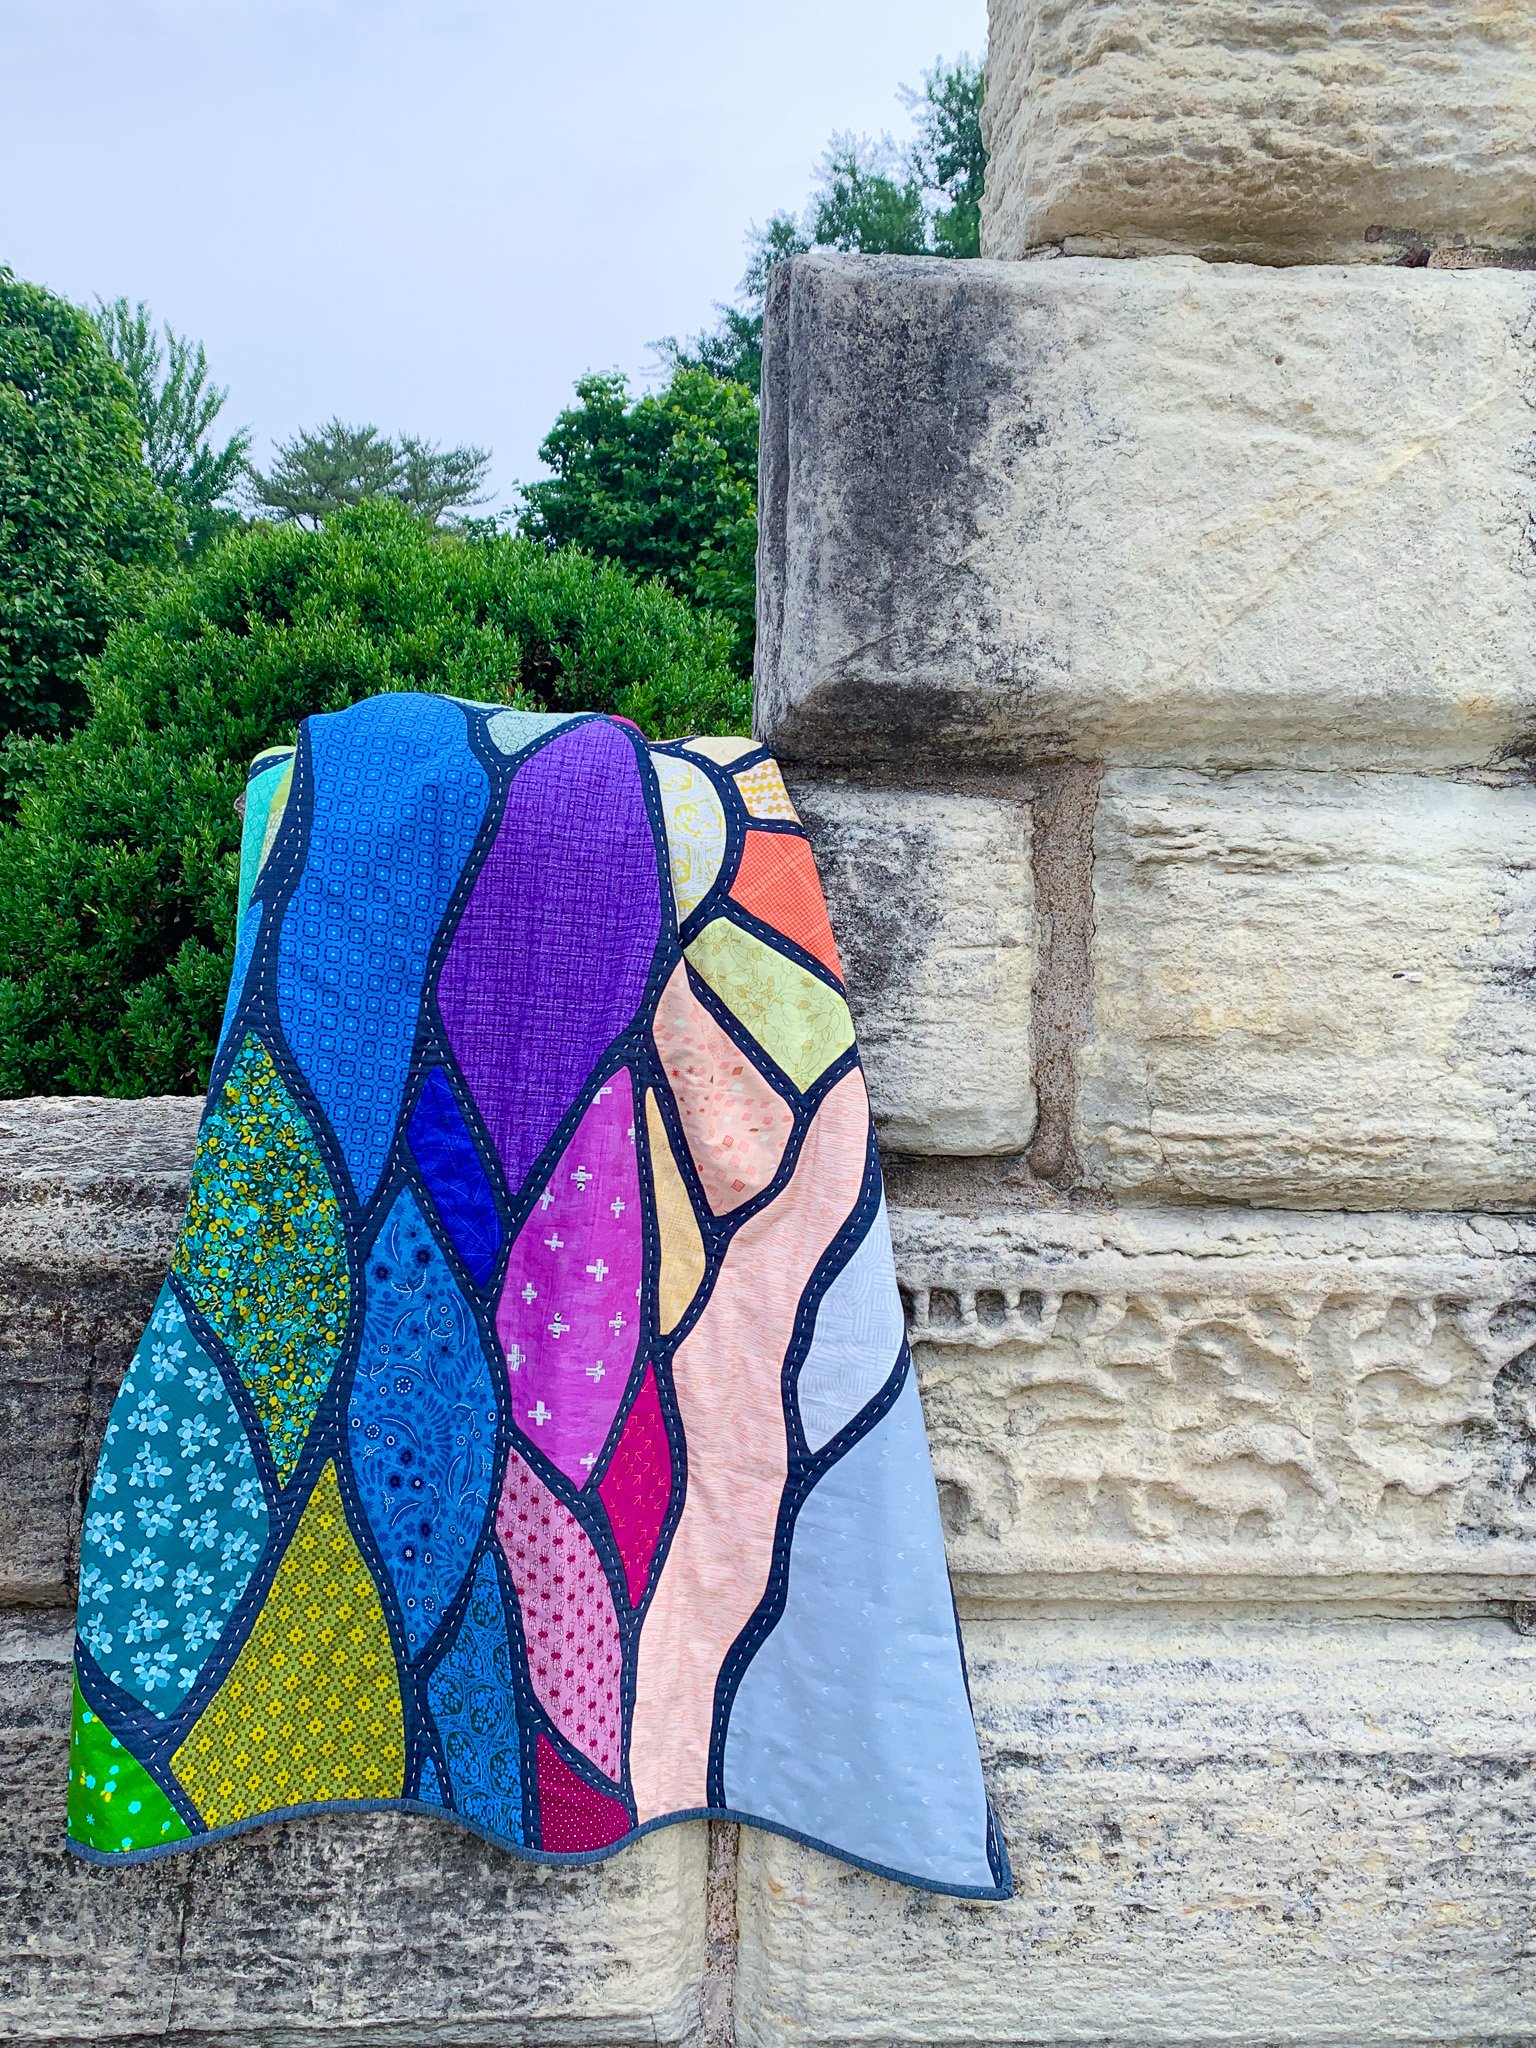
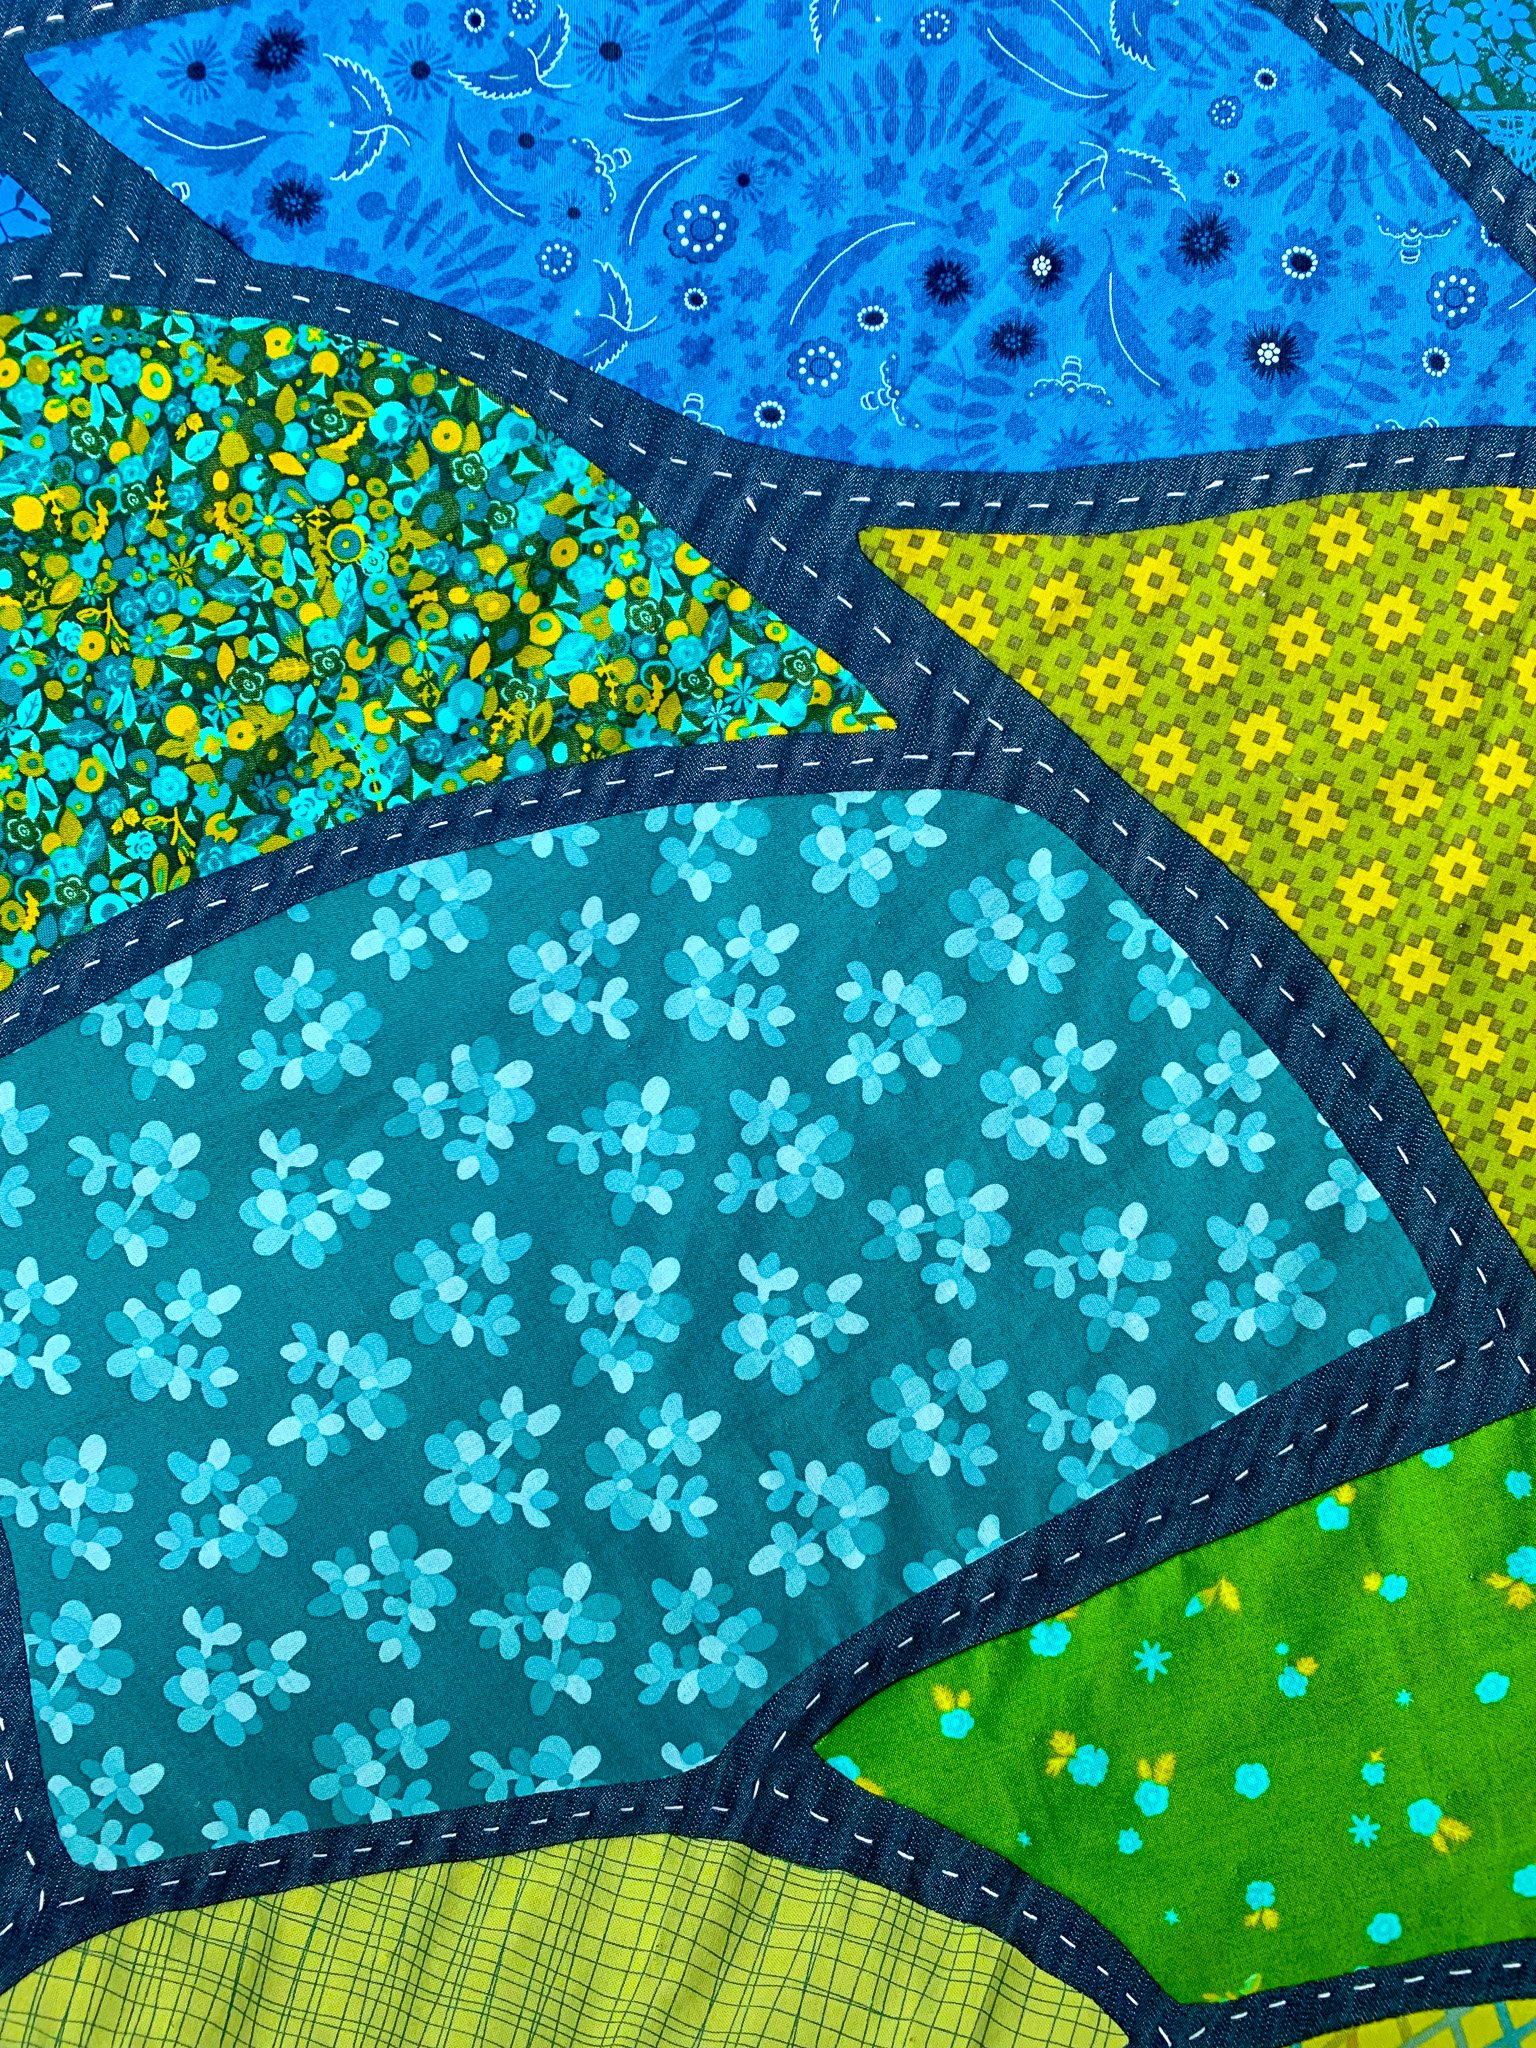
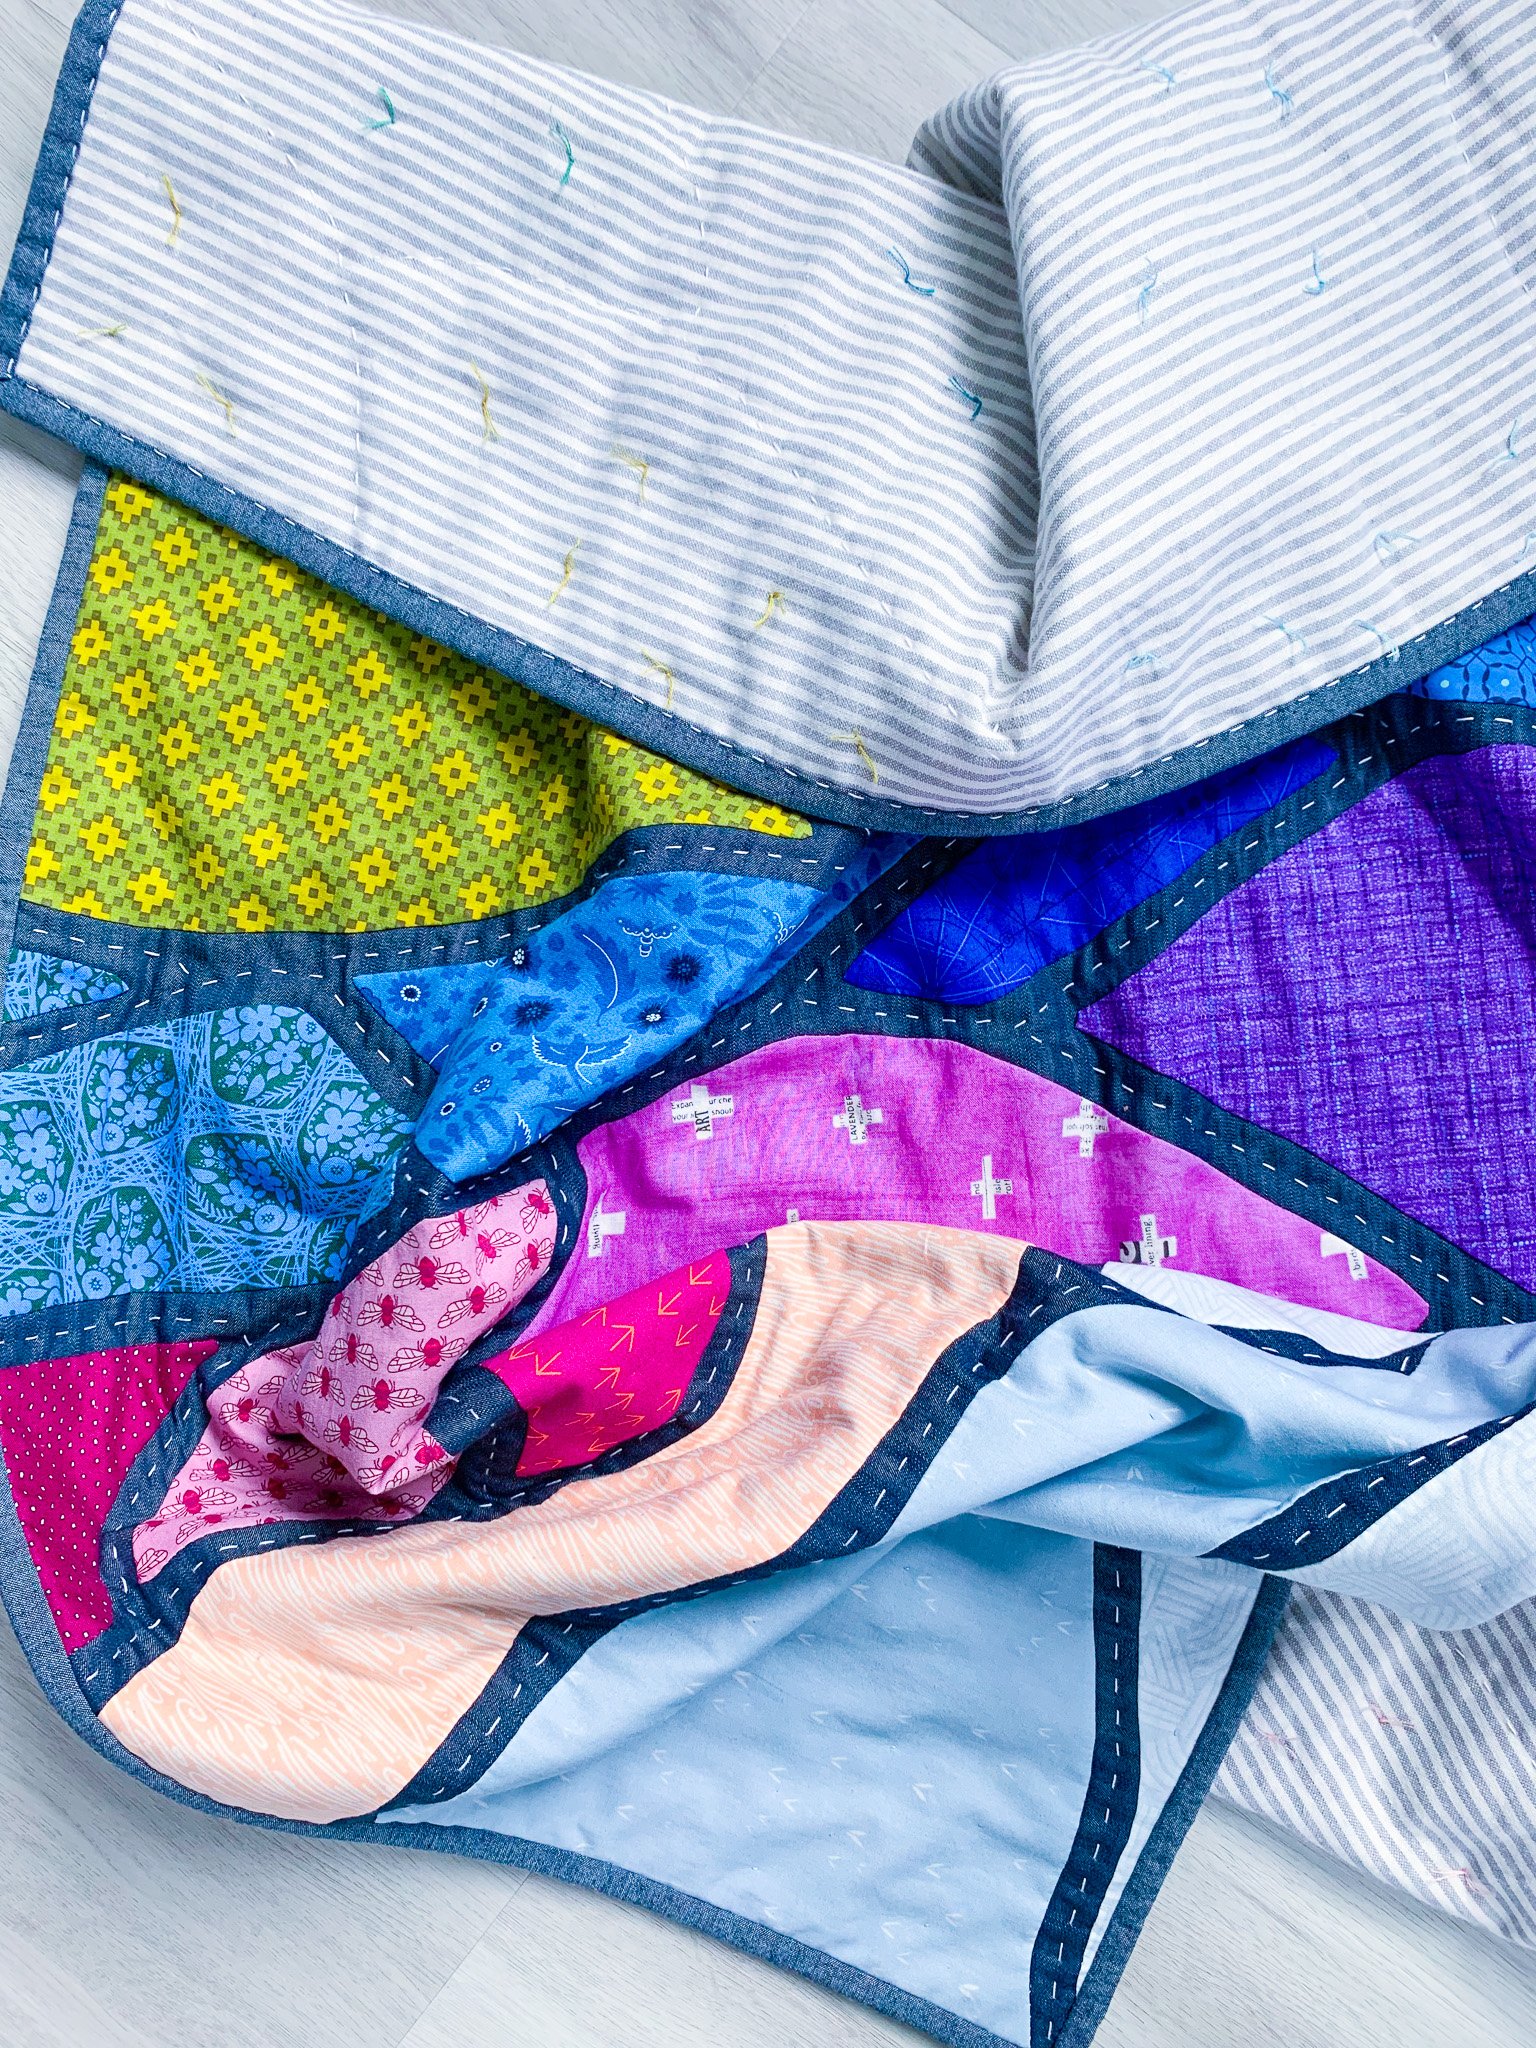
I decided to use needle-turn appliqué to attach the shapes, but I didn’t need to add seam allowances to the templates because I wanted to create space between each shape where the background would peek through. This would create the shape “outlines” Jim used in his painting. After cutting everything out, I spent a ridiculous amount of time sorting through my stash for the right fabrics — in terms of both print and color — to fill in each space. Remarkably, I only needed to purchase a few FQs to supplement, mostly in the purples (I keep very few “true” purples in my stash.).

Then it was time to trace and cut everything out and get it placed correctly on the background, for which I used a dark denim chambray. I pinned and then hand basted each shape in place, then spent months hand appliquéing each one. It was so fun to start to see the outline appear as each shape was attached.

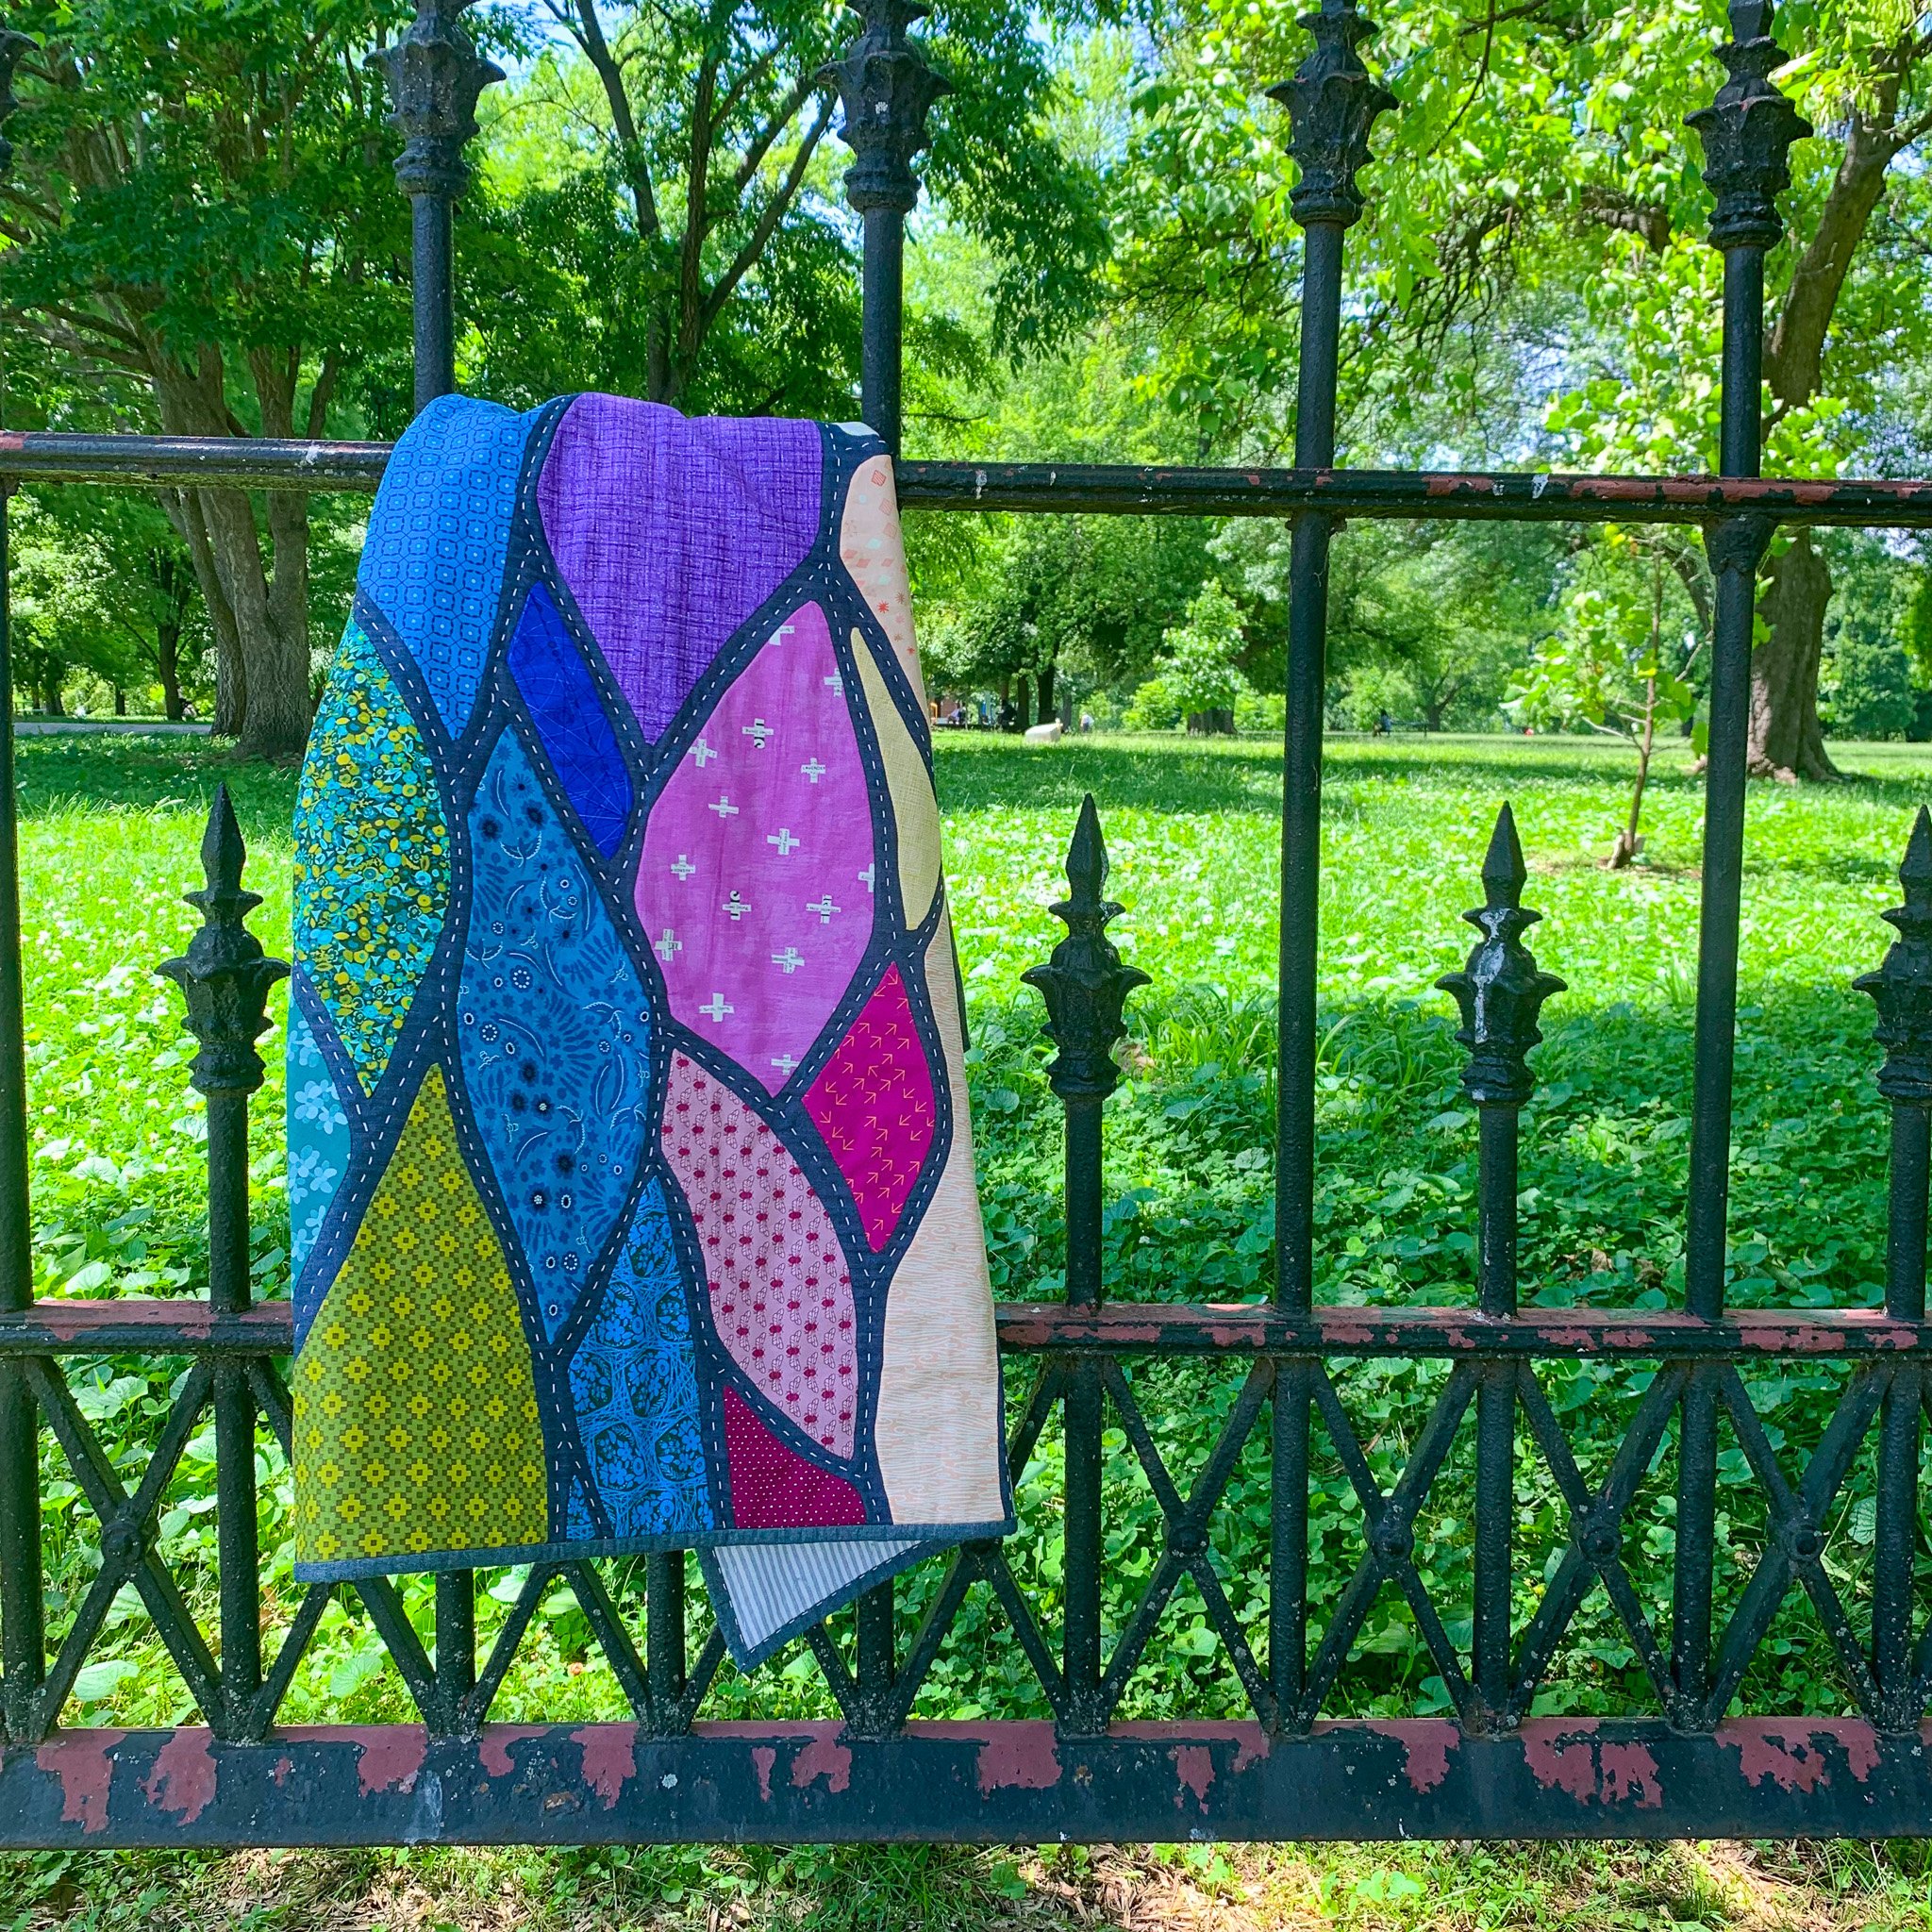
For the hand quilting, I began with a big-stitch running stitch down the middle of each “outline,” mimicking the dashed lines in the original artwork. To help secure the pieces, especially the larger ones, I also hand tied each one in several spots, creating a rainbow of ties on the light-colored Essex linen-blend backing. I used a lighter denim chambray for the binding and finished it off with some big-stitch binding.

From recreating the art as templates to finding all the right fabrics, then hand appliquéing, quilting, tying, and binding the finished piece, it was a delightful adventure from start to finish. I was so glad my brother and sister-in-law were thrilled with it (it was a surprise gift to her, and she was shocked) and so happy my sweet little nephew will get to enjoy it for years to come.
You can find a list of my favorite needle-turn appliqué supplies in this post and my favorite supplies for big-stitch binding and quilting in this post.


